

What’s Actually Included in a Professional Door Installation Service?
Most homeowners assume door installation means swapping one door for another. The truth is, the most important work often happens where nobody is looking — under the sill, around the frame, behind the trim, and along the exterior seal.
The first time I lifted out an old exterior door and found the wood beneath the sill completely rotted through, I realized how much of this job happens where homeowners cannot see it.
A complete door installation service covers far more than the door itself. It includes removing and disposing of the old unit, reinforcing and sealing the sill, insulating around the frame, fitting interior trim, capping the exterior, installing hardware, and reconnecting your doorbell when needed.
What you actually get depends entirely on who you hire — and whether you know the right questions to ask before you sign anything.
This guide breaks down what a thorough installation should include, where shortcuts happen, and how to protect yourself before hiring a door installation company.
The Core Services Included in a Professional Door Installation
A professional door installation starts before the new door arrives. The existing unit — frame, sill, and all — gets removed and hauled away. That is not a given with every company, so confirm disposal is included in your quote.
Once the opening is clear, the new frame and slab get fitted into the rough opening, levelled, and shimmed square. Getting this right matters. A door that is not perfectly plumb can drag, latch poorly, leak air, and wear unevenly over time.
The part that surprises most homeowners is sill reinforcement and sealing. Every time I walk a homeowner through what we are doing, they look at me like I have added something to their bill. I have not. It is a standard part of the job — not an add-on — and any installer worth hiring should treat it that way.
The sill is where the door meets the floor and the exterior grade. It takes more abuse than almost any other part of the assembly. Reinforcing it before the new door goes in means you are not replacing one failing component with another.
Core installation should include:
- Removal and disposal of the existing door unit.
- Fitting and levelling the new frame and slab in the rough opening.
- Shimming and securing the frame so it is plumb, level, and square.
- Sill reinforcement and sealing as a built-in step, not a surprise extra.
If a quote does not mention the sill, ask about it directly. A company that skips over it is either cutting corners or planning to charge you later.
Insulation, Weatherproofing, and Sealing the Door Sill
Once the frame is set, the gaps around it need to be addressed — and this is where many budget installs fall short. The space between the door frame and the rough framing should be packed with expanding foam or batt insulation to help eliminate drafts and reduce heat loss.
In Canada, where temperatures swing dramatically between seasons, this is not optional. It is the difference between a door that performs and one that drives your heating bill up all winter.
The exterior perimeter gets caulked to create a watertight seal, keeping rain, snowmelt, and humidity from working behind the frame.
The sill deserves its own attention. It sits at the lowest point of the assembly, making it the most vulnerable spot for water infiltration.
I had a customer whose subfloor was completely rotten by the time we pulled the old door. Water had been tracking under the threshold for years. Once we replaced the damaged material and sealed the new sill properly, the infiltration stopped entirely.
A complete weatherproofing package includes:
- Expanding foam or batt insulation packed around the full frame perimeter.
- Exterior caulking along all seams where the frame meets the exterior cladding.
- Sill sealing with appropriate materials to prevent water from tracking inward.
If energy performance is part of your decision, our guide on whether entry doors are energy efficient explains how modern insulated doors help improve comfort and reduce drafts.
Trim, Capping, and Exterior Finishing
Interior trim frames the door from inside your home. Casing gets cut, mitered, and nailed flush on both sides. Done right, it looks clean and tight. Done poorly, you get gaps that grow as the wood moves through seasonal humidity changes.
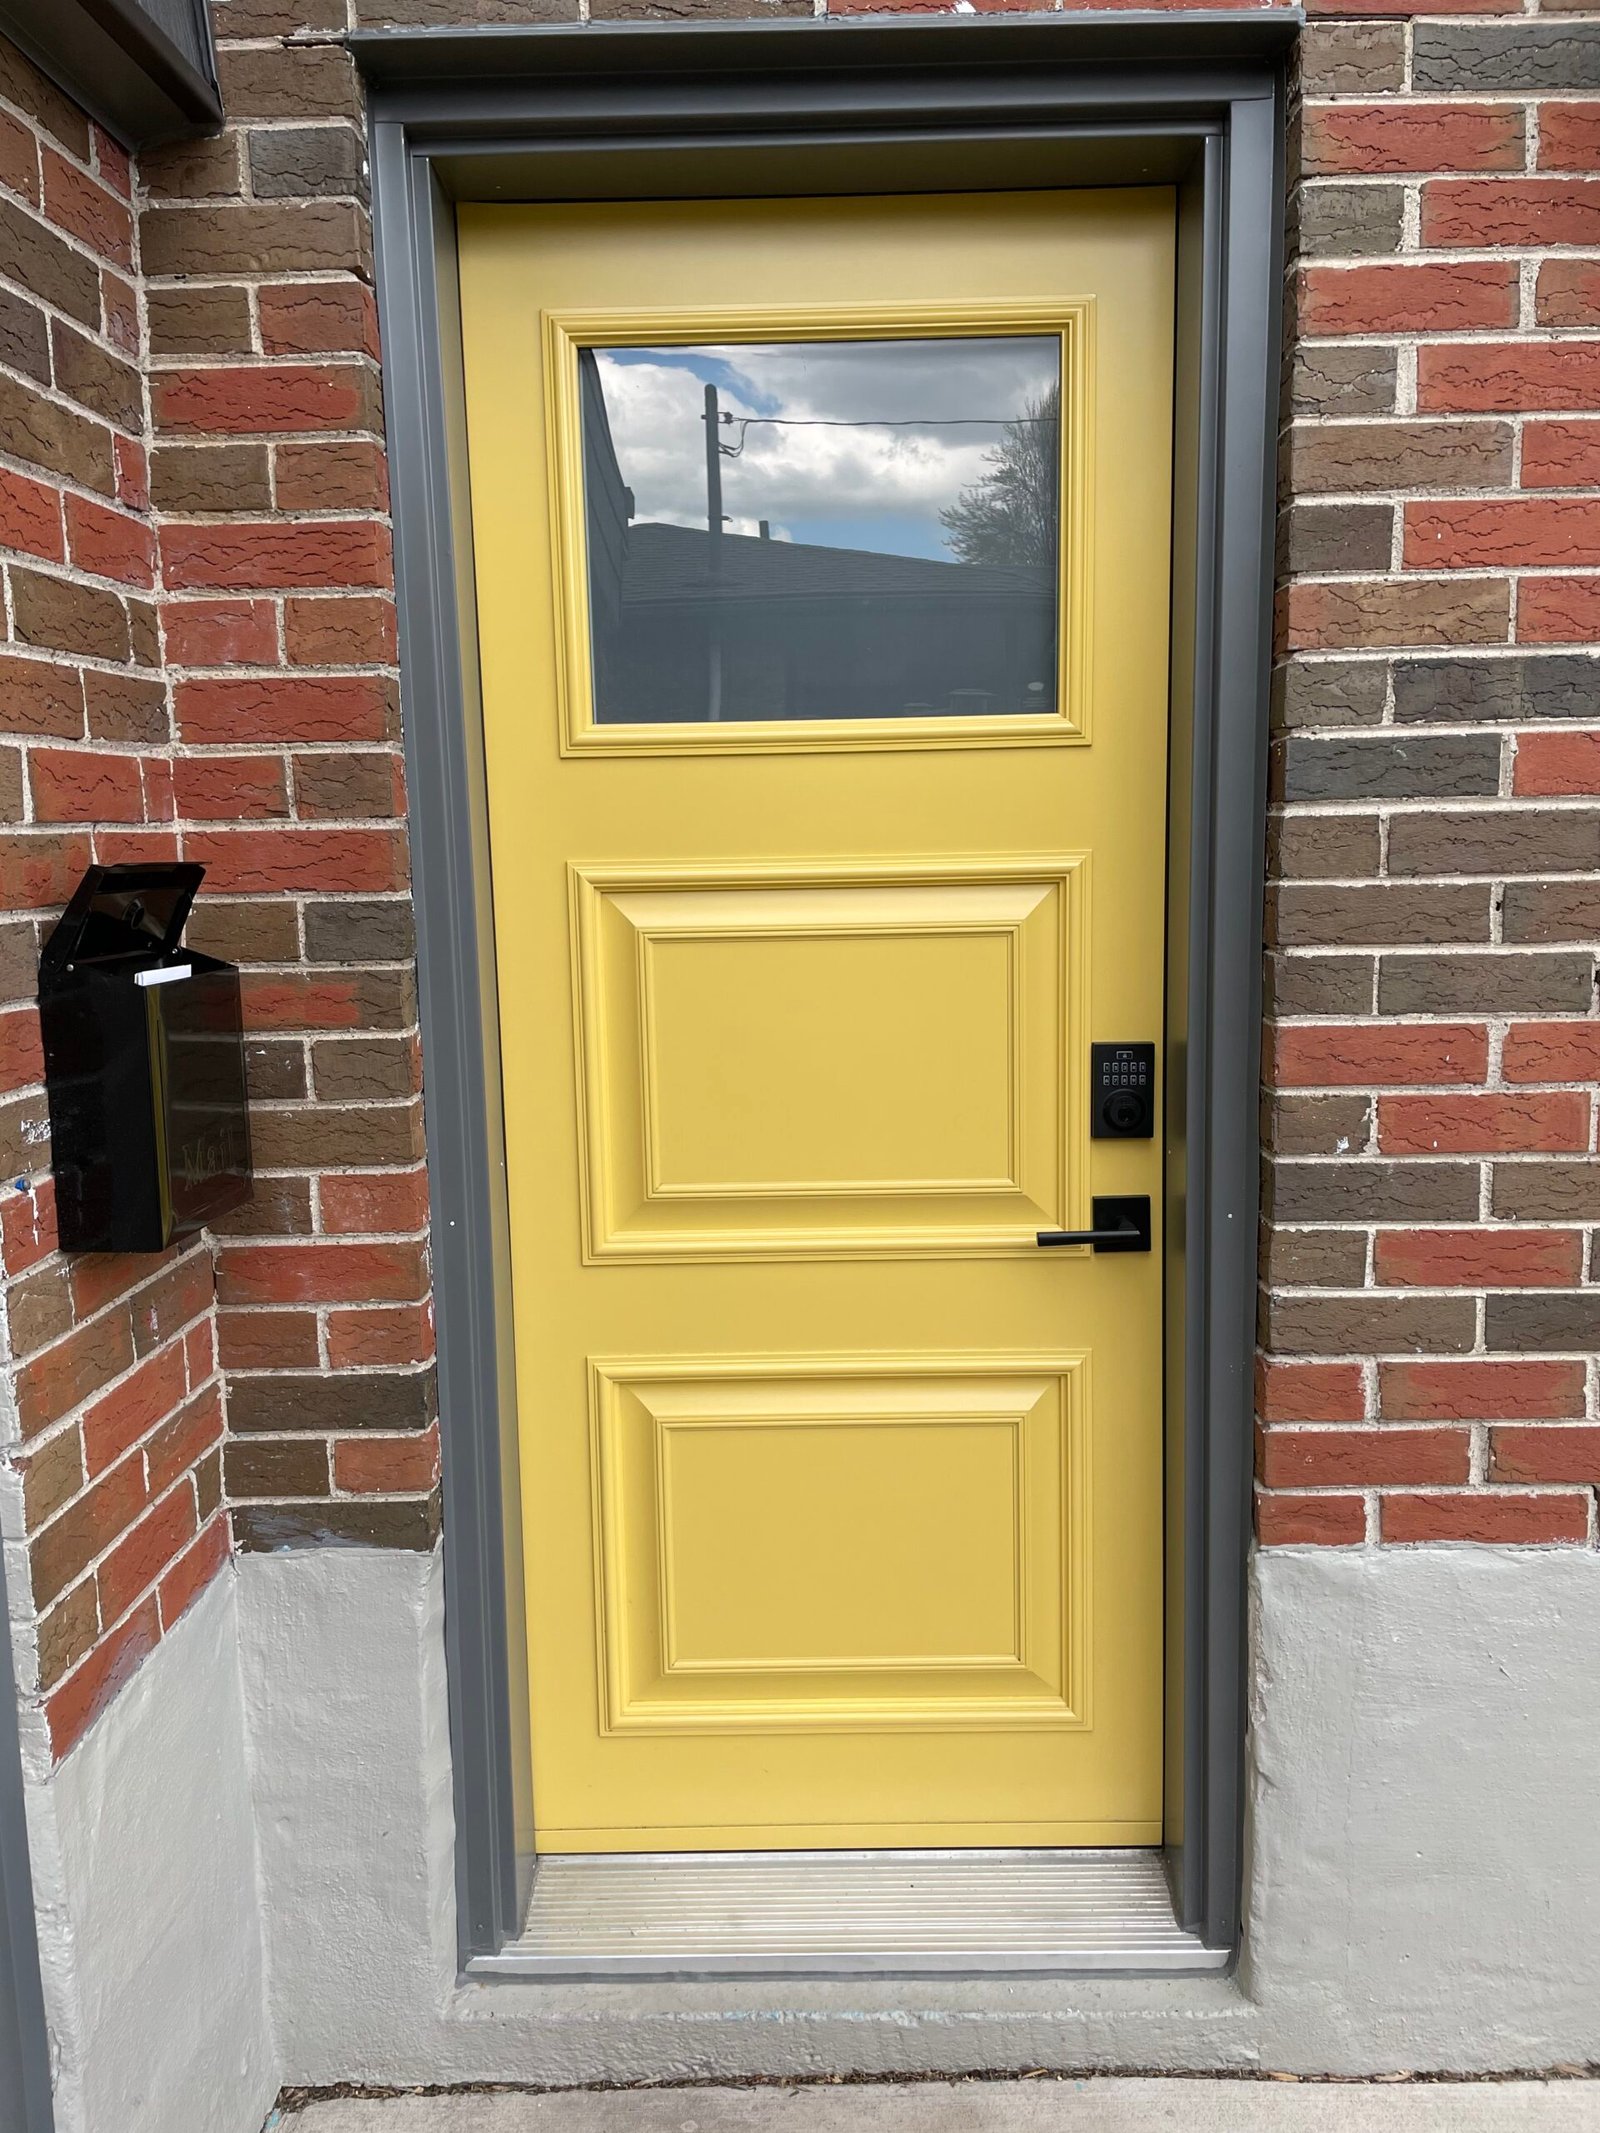
Exterior capping is where I see the biggest gap between what is included and what should be. Capping is the aluminum or PVC wrap applied over exterior wood trim to protect it from moisture and rot.
Most companies leave capping out of their base quote and charge for it separately. At Great Northern Home Exteriors, exterior capping is included as a standard part of every exterior door installation. It is not an upgrade. It is part of doing the job properly.
When a company quotes low and invoices for capping afterward, that is not a surprise. That is a business model.
The quality difference between a budget and a premium install almost always comes down to the same three things: proper trim, thorough caulking, and whether capping is included from the start.
What good finishing work looks like:
- Interior casing cut, fitted, and nailed flush with no gaps at the corners.
- Exterior capping over all exposed exterior wood trim.
- Full caulk coverage at every interior and exterior transition point.
Homeowners comparing style options can also read our guide on choosing the right entry door for your St. Catharines home before making a final decision.
Hardware, Locksets, and Doorbell Connections
A complete installation covers the lockset, deadbolt, hinges, and door handle. Whether the hardware is supplied by the homeowner or the installer needs to be confirmed before the job starts — not when the crew shows up.
On front door replacements, the doorbell position often shifts because the new frame may not align with the existing wiring. Reconnecting or relocating the doorbell is a small job, but it gets skipped more often than you would think.
Hardware checklist to confirm in writing:
- Lockset and deadbolt installed, or confirmation that the homeowner supplies them.
- Door handle and hinges set, adjusted, and checked for smooth operation.
- Doorbell reconnected or relocated as needed.
The 3 Door Installation Mistakes That Cost Homeowners the Most Money
I have seen the same three mistakes repeated by budget installers and overconfident DIYers alike.
1. Bad Trim
Trim that is poorly cut or hastily nailed will gap and warp within a year. It may look fine on installation day and start falling apart by the following spring. The fix usually costs more than doing it right the first time.
2. Not Sealing the Sill
This is the costliest mistake. Water tracks silently under the threshold, into the subfloor, and down into the structure. By the time a homeowner notices, the damage is already done.
Proper sill sealing at installation is inexpensive compared to subfloor replacement. This is not the place to play contractor roulette.
3. Mismeasuring the Rough Opening
A door unit that does not fit properly has to be shimmed excessively to compensate — and there is a limit to how far shimming can take you. In the worst cases, the door gets reordered entirely, adding cost and delaying the job.
Hidden Costs and Legitimate Add-Ons
The only genuine surprise cost in a door installation is structural damage found once the old door comes out. Rot under the sill, deteriorated framing, compromised sheathing — none of this is visible until the existing unit is removed.
When damage is found mid-job, the installer should stop. They should show the homeowner exactly what they are looking at, explain what needs to be repaired and why, and get approval before touching anything.
Protect yourself upfront by asking directly what happens if rot or damage is found once the door is out. A company that handles this transparently will have no hesitation answering it.
Questions to Ask Before You Hire a Door Installation Company
Ask every company you are considering these questions before signing anything:
- Do you include exterior capping in your base price?
- Do you insulate around the door frame?
- Do you install the hardware, or does that come from me?
- Do you reconnect the doorbell if the position changes?
- What happens if you find rot or structural damage once the old door is removed?
- What warranty do you offer on labour and materials?
A thorough installer will answer all of these without hesitation. A bare-minimum provider will hedge or treat them as add-on conversations.
In Canada, add one more layer to the conversation: warranty and weather performance. Freeze-thaw cycles are hard on exterior doors. A seal that holds in July needs to hold in January too.
What a Complete Door Installation Should Look Like
A complete door installation service should cover removal and disposal of the old unit, sill reinforcement and sealing, insulation around the frame, exterior caulking, interior trim, exterior capping, hardware installation, and doorbell reconnection where needed.
The gap between a budget and a premium install lives in the finishing details — trim quality, caulking thoroughness, and whether capping is included from the start. These are the things that protect your investment over ten or twenty years, not just on installation day.
Great Northern Home Exteriors installs premium entry doors for Niagara homeowners with careful measuring, proper sealing, clean trim work, exterior capping, and a no-pressure estimate process.
Looking for a local installer? Learn more about our St. Catharines entry door installation services or our Niagara Falls entry door installation services.
Professional Entry Door Installation in Niagara
A new entry door should do more than simply open and close. It should improve energy efficiency, increase security, reduce outside noise, and add lasting curb appeal to your home.
Professional installation ensures the frame is square, the weatherstripping seals correctly, and the sill is properly reinforced against moisture. These details are often invisible once the project is complete, but they have the biggest impact on how well the door performs over the next twenty years.
Whether you are replacing an aging steel door or upgrading to a decorative fibreglass entry system with sidelites and a transom, proper installation protects your investment from day one.
Frequently Asked Questions About Door Installation
What is included in a professional door installation?
A complete professional door installation should include removing and disposing of the old door, fitting and levelling the new frame, insulating around the frame, sealing the sill, caulking the exterior, installing interior trim, adding exterior capping, installing hardware, and reconnecting the doorbell when needed.
Does door installation include hardware?
It should include installing the lockset, deadbolt, hinges, and door handle. However, you should confirm whether the hardware is supplied by the installer or by the homeowner before the job begins.
Is exterior capping included with door installation?
Not always. Some companies charge extra for exterior capping. Great Northern Home Exteriors includes exterior capping as a standard part of exterior door installation because it helps protect exposed trim from moisture and rot.
Why is sill sealing important?
The sill is one of the most vulnerable areas of an exterior door because it sits at the lowest point of the opening. Proper sill sealing helps prevent water from tracking under the threshold and damaging the subfloor or framing.
What happens if rot is found during a door installation?
If rot or structural damage is discovered after the old door is removed, the installer should stop, show the homeowner the issue, explain the repair, and get approval before completing additional work.